I hope you followed the previous tutorial where we checked Created some brand new database tables using Excel as a template.
Let’s populate these tables with meaningful data. Okay, it might not be the most meaningful dataset since I just made this data up using Mockaroo.com. (Incredible site for creating sample data on the fly.)
For this activity, Use Data from three Excel Tables to Populate tables in Microsoft SQL Server.
We provided the sample data to make it easier for you to follow along or totally steal my templates and create your own smooth SQL queries.
Here are the samples of our tables.
The Sample Data
Expert table – Stores the ID, Name, and Birthday of our Experts

Technology Table – Stores the Technology Names and basic information about the technology

Expert Technology Table – Shows which Technologies the Experts are proficient in

Let’s populate our first table using this “Insert Statement 1 tab” of the example worksheet. Here is our template.

The row in green is for labeling purposes only.
To see what’s going on, toggle to formula view, Shortcut (CTRL + `).

The benefit of using Excel to Format is that you only have to set up one data column, and then you can drag the formula to the end of the data set.
The formatting between Row 5 and row 6 and below are different since row 5 contains headers, and six and below have the imported information.
The Second Half of the Insert Table
Notice these metadata fields have different formatting as well.

Column N is ready to cut and Paste into Microsoft SQL Server.
Before you cut and paste, you deserve an explanation as to what just happened.
Please follow along with the sample data for a better understanding.
Our first tab, the “source data” tab, is what we want to upload. The “Insert Statement 1” tab accomplishes these tasks:
- Calls the cell values from Source data – First, using quotes and & symbols, we format each piece of data ready for a download.
- Formatting them as a String for our SQL upload – Then, We use the Concat formula to String it all together.
Our Helpful Friend, Metadata
As mentioned earlier, three of the columns are metadata:
- Modified by – Tracks the last person to edit a column
- Timestamp – Tracks the date a column was last edited
- Rowversion – This Field is used in a couple of ways. Keep duplicate rows and rely on the latest row version to indicate the newest record or replace older rows and have the row version signal how many times this row has been altered.
Now Post this script into MSSQL and run that sucker.
Scripting our Excel Formulated Insert Statements into Microsoft SQL
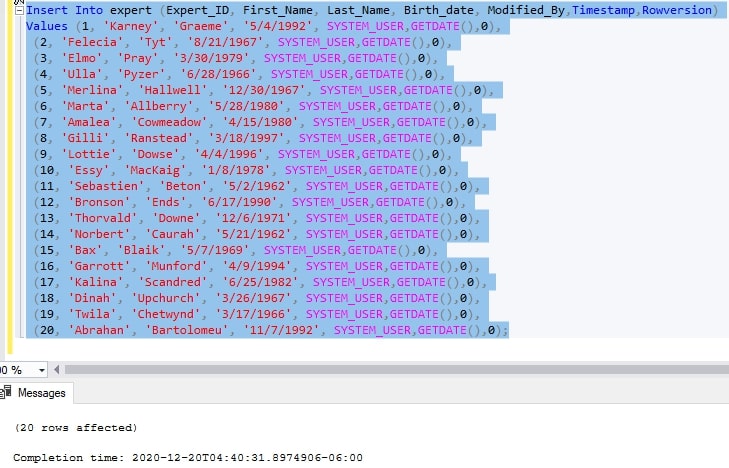
After successful query execution, the Message box reads 20 Rows updated.
Since the first scripts worked out, try the same process with our other two insert scripts.
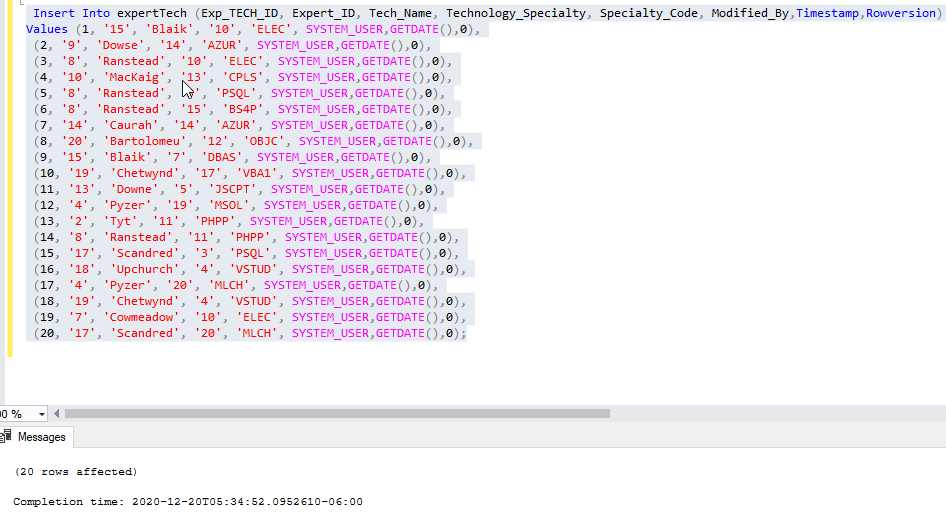
Table 2 Loaded.
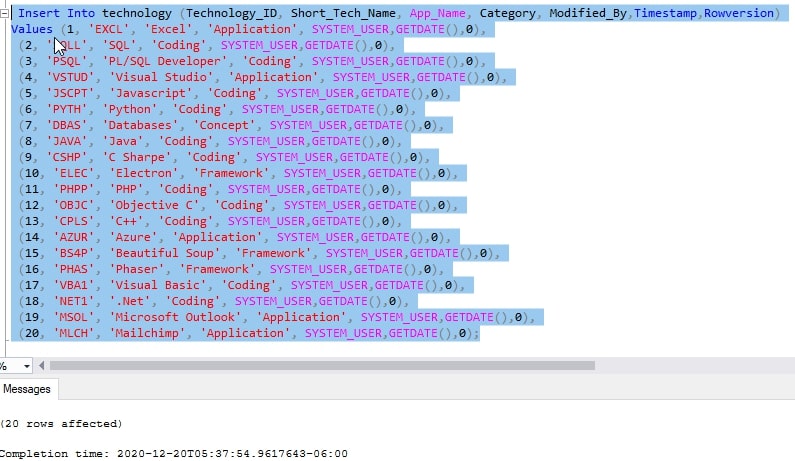
Table 3 Loaded.
Check your Work
Time to double-check our results.
Use the scripts below to check out the first three results from each table because we don’t want to look through every single line!
These scripts utilize sub queries, more fun for a later discussion.
–Get Top 3 Records for Each of our Newly Created Tables
SELECT * FROM testExpert.dbo.expert
WHERE Expert_ID IN (SELECT TOP 3 Expert_ID FROM test expert.dbo.expert)
SELECT * FROM testExpert.dbo.expertTech
WHERE Exp_TECH_ID IN (SELECT TOP 3 Exp_TECH_ID FROM testExpert.dbo.experttech)
SELECT * FROM testExpert.dbo.technology
WHERE Technology_ID IN (SELECT TOP 3 Technology_ID FROM testExpert.dbo.technology)
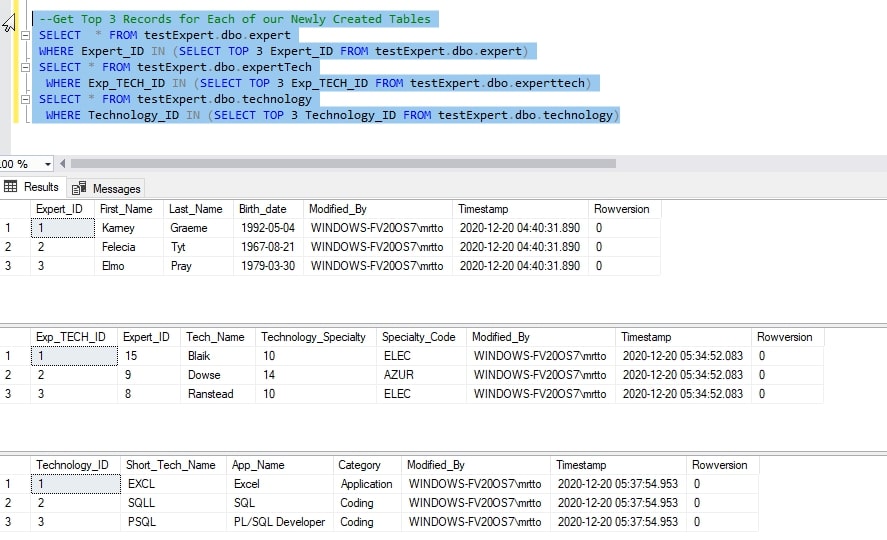
We just completed a multiple-row insert in SQL using an Excel template.
Go ahead and start slamming records into some tables, carefully.
It’s possible to Insert statements one at a time. Especially if you want to play it super safe. Let’s discuss next time.


